+1-(877)-925-5132 - Toll Free Phone
www.septicsoutions.com - Website
Diaphragm Replacement Kit for Delta Environmental Whitewater Model 60 and Model 80 Air Pumps
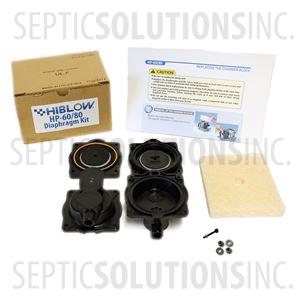
This diaphragm air pump repair kit for Delta Whitewater Model 60 and Model 80 linear pumps is the standard rebuild kit and includes the necessary components for replacing the diaphragms on your pump. The diaphragms normally need to be replaced every 4 to 6 years depending on the application. When the diaphragms fail, the pump will shut off and your alarm should sound. If the air pump is over 10 years old, we would recommend replacing the air pump.
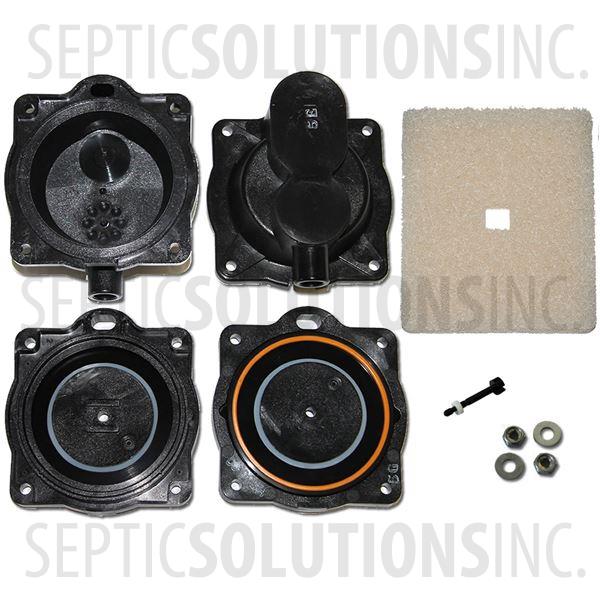
This kit includes 2 diaphragms with mounting blocks, 2 heads with air valves, a replacement air filter, and a replacement saftey screw.
In Stock
Item #:DW6080Kit
Manufacturer:Septic Solutions
THIS REPAIR KIT INCLUDES
- 2 Diaphragms with Mounting Blocks
- 2 Diaphragm Heads with Factory Installed Air Check Valves
- 2 Replacement Locking Nuts and Washers
- Replacement Safety Screw
- Replacement Air Filter
REPAIR INSTRUCTIONS
Below are instructions on how to install this repair kit in a Hiblow air pump. Please be sure to disconnect power from the unit before completing repairs.
TOOLS NEEDED TO COMPLETE INSTALLATION:
- 7mm or 1/4in Wrench, Socket, or Nut Driver
- Phillips Screwdriver
- Flathead Screwdriver
- Needlenose Pliers (Optional)
- Time to complete: 15-30 minutes
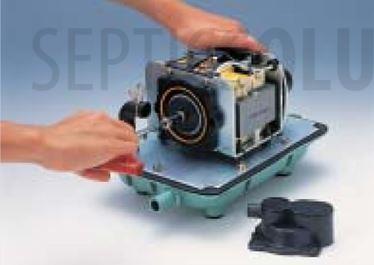
STEP 1: REMOVE THE AIR PUMP UPPER HOUSING
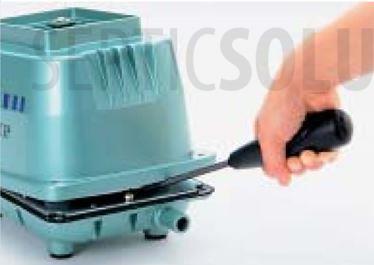
Remove all the bolts from the four corners. NOTE: DO NOT DISCARD BOLTS, THEY WILL BE REUSED. This is done easier using a 7mm or 1/4in socket instead of a phillips screwdriver. Using a phillips screwdriver could cause you to strip out the bolts. If upper pump housing is difficult to remove due to the heavily stuck internal seal, pry it open by inserting the tip of a flat-head screwdriver into the clearance between the exhaust nozzle and upper housing.
Pull off the white sound absorber from around the internal pumping unit and disconnect the L-TUBES on each end from the diaphragm head.
STEP 3: REMOVE THE DIAPHRAGM HEADS
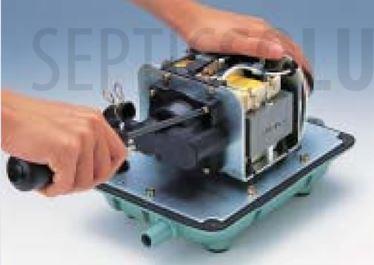
Using a phillips screwdriver. Remove the four screws that hold the chamber block and the casing block on both side (4 screws on each side). NOTE: DO NOT DISCARD SCREWS, THEY WILL BE REUSED.
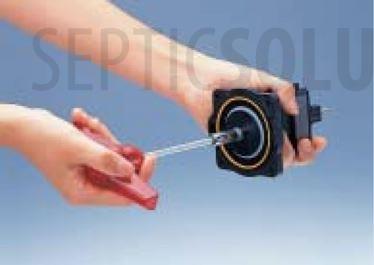
STEP 4: REMOVE THE DIAPHRAGMS
Using a 7mm (1/4in) wrench or nut driver remove the U-lock nuts that hold the diaphragm to the magnetic rod block. Remove one of the diaphragms from the actuating rod and pull out the other diaphragm with the magnetic rod. Finally separate the diaphragm mounting block and rod.
STEP 5: INSTALL THE NEW DIAPHRAGMS
Install the new diaphragm on the actuating rod before inserting the rod back into the pump. Use new U-lock and washer that come with the kit to prevent loosening and causing failure of the pump.
Insert the actuating rod in accordance with the gap of the frame. Secure the diaphragm on the other side and tighten the U-lock nut with the box driver. Make sure the gapes between the actuating rod and the electromagnet are even.
STEP 5: INSTALL THE NEW DIAPHRAGM HEADS

Install the heads on both sides with the 4 screws that were removed originally. Reconnect the L-Tubes to the diaphragm head on each side.
STEP 6: INSTALL THE NEW SAFETY SCREW
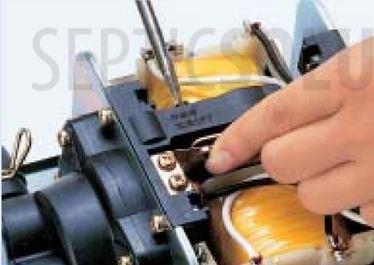
Draw a new safety screw through the hole in the SP switch and the holes in the L shaped lever and spring contact. Fasten the screw with the nut supplied and tighten with a flathead screwdriver. The screw is designed so that the nut will turn freely when it is properly fastened. Stop tightening when this happens.
A trick to getting the nut on the safety screw is to use a pair of needlenose pliers to hole the nut in place while you turn the screw into it.
STEP 7: INSTALL THE SOUND ABSORBER AND UPPER HOUSING
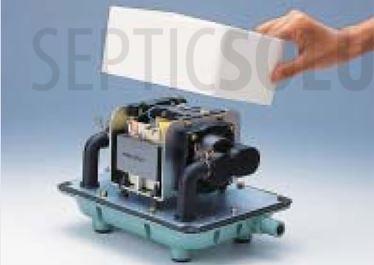
Replace the sound absorber removed in STEP 2 and place the upper housing back on the body. Secure the upper housing with the bolts that were removed in STEP 1.
STEP 8: ALL DONE!
Hook your air pump back up to your system!